 |
|||||||||||||
| anchor_top | gallery | ||||||||||||
|
This page is intended for use as a resource for anyone with an interest in basic stage lighting. The intention is to refresh the memories of those with some experience and provide some pointers for those without experience.
|
|||||||||||||
|
|
|
||||||||||||
|
HOW DOES THE ROBE ROBIN 800 WORK?
The enhanced ROBIN® 800 LEDWash brings Robe’s patented system for seamless, even and smooth zoom and output of RGBW multichip LED technology a step further. Brighter LED chips and a removable beam shaper module with motorized rotation creates the perfect combination for theatre, TV and other professional applications. The fixture has an incredibly wide zoom range starting at 8 degrees and going up to 63 degrees. Many enhanced features include quiet zoom operation, Beam/Wash zoom mode, virtual colour wheel with calibrated whites, RGBW/CMY colour mixing and more. The touch screen navigation display supports many controlling protocols, status data logging, software updates and other features which are standard in the Robe ROBIN series. Three LED rings with individual colour control of each LED ring, pre-programmed random strobe & pulse effects and individual zone strobe effects, variable speedStrobe effect with variable speed (max. 20 flashes per second) and Zoom Range linear motorized zoom 8° – 63°, only some of its special features. More info in what's new? For a free quote and demonstration please click on our hire department manager's name Martin Bowman |
WHY AM I BLOWING LAMPS?
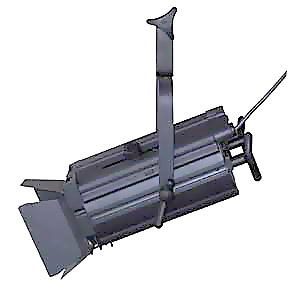
The top five reasons lamps are blowing too quickly are: 1. Your fixture is upside down (image below). See "How to Correctly Hang a Light"  2. When changing a quartz halogen lamp care must be taken not to touch the lamp with bare hands as the residue left by oils in our skin will significantly reduce the life of the lamp if not cleaned with alcohol before use. Use a tissue or plastic bag when fitting lamps. 3. Theatrical lamps, like most light globes, have fragile filaments so they can be broken by dropping either the fixture with the lamp fitted or dropping the lamp itself, even when it is still in the box, treat them like eggs. 4. When focusing fixtures, it is important not to jar the fixture with sharp movements as the lamps become more fragile when they are hot. If you are having trouble moving any of the focus parts of the fixture, turn it off and come back after it has had a chance to cool down a bit. Loosen off the parts you need to use and then try again. 5. When you wish to move lights around after a performance or a focusing session, give them a chance to cool down for a while before attempting to move them. |
||||||||||||
|
|
|
||||||||||||
|
PLASTIC GOBOS
The Selecon Pacific profile has the unique ability of projecting inexpensive plastic projections or plastic gobos - made from transparency film. Colour images, photographs and text can be used as gobos and projected using the Selecon Pacific 600w profile.The Selecon Pacific uses a flat cold mirror and external heat sink to remove most of the U.V and infra-red light from the beam. This gives a relatively cool gate (where the shutters reside, and the gobos are inserted). By setting up the 600w Pacific lamp module, it is possible to use overhead transparency film to create colour gobos. This was previously possible, only through the use of custom glass gobos. It is necessary to realise that plastic gobos have an indeterminable life span, they will eventually deteriorate. If permanent installation is required, or an image is to be used constantly for lengthy periods, we recommend using custom gobos. Please contact John McKissock for further details on custom gobos. How To Make Your Own Plastic Gobos Take a photo with a digital camera and download the image onto your computer. Copy your images and paste them onto a template, either A, B or M size. Gobo Sizes: A size - 100mm outside diameter - 75mm image diameter B size - 86mm outside diameter - 64.5 image diameter M size - 66mm outside diameter - 49.5 image diameter Once you're happy with the layout of your images, it's time to print To print gobos, a colour ink-jet printer (bubble jet) is required. Over head transparency film for colour ink-jet printers must be used. This is a widely available at most stationary outlets. When loading the transparency film into your printer, make sure it's the rough side of the film that it prints on. (This will vary from printer to printer) Preparing the Pacific for transparency projection Transparency gobos can ONLY be used in the Selecon Pacific Profile with the 600w GKV lamp base (blue module). Using any other profile could be dangerous and at the very least will turn your gobo into melted plastic. 1. Remove the lamp module from the bottom of the Pacific. This is the part that the lamp sits in. It is easily identified by the coloured plastic around the bottom. To remove, place one hand underneath the module and with the other simply undo the small black knob directly beneath the bottom shutter. Remove slowly, being careful not to touch or knock the lamp. 2. Once you have removed the lamp module, you need to lower the lamp position. Hold the lamp module so that the coloured plastic is facing you and turn the centre dial underneath the module anti clockwise. The lamp should now be lowering. Continue turning the dial until the cup that the lamp sits in is roughly at eye level with the edge of the plastic lamp module. 3. Replace the lamp module within the pacific housing, being careful not to knock or scrape the lamp on the reflector inside the housing. Make sure the lamp module ridge is located firmly in the recess at the rear of the pacific housing and the front catch is positioned underneath the washer and the black knob. Tighten the knob to secure the lamp module. Now the Pacific should be ready to project transparency gobos. Place your transparency upside down in a gobo holder and locate the gobo holder in one of the two gate runners (in the opening at the top of the Pacific lens tube where the top shutter is protruding). Make sure the gobo holder sits firmly within the gate. It should not be able to fall forward. For best results: Use the 600w GKV lamp module (the one with the blue plastic around the bottom)Please note that plastic gobos are not designed for permanent installations; they will degenerate over time. |
HOW TO CORRECTLY HANG A LIGHT
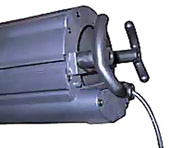
1. On a Lighting Bar Look for the place where you put the colour filter frame into the light, this will be the top of the light.  When a light is hung upside down, the filament of the light can get compressed in the wrong direction making the lamp likely to blow quickly. Getting the light hung the correct way will save you money. Before the light is actually put on a bar it is important to get the hook clamp (also known as a C-clamp) fixed to the light correctly. We recommend using a spring washer with your bolt set to prevent the lamp becoming loose while focusing. Lastly tighten with a spanned so that the spring washer is compressed. This will hold the hook clamp tightly in place and ensure that once you have focused the light it will stay there. Now that we know which way to hang the light and we have tightened the bolt set, we can put our light on to the bar. Hang the clamp over the bar so that it sits snugly, with no gap between the clamp and the bar. Tighten the tri-nut or bolt on the clamp. Attach a safety wire or chain to the light and to the bar. This is a very important piece of equipment that is often overlooked. Safety wires are not expensive and can save money and possibly even lives. Attach the safety wire to the body of the light, not just through the yoke. Ensure that the clip on the safety wire is closed, otherwise it becomes useless. We recommend using a safety wire that is rated (tested and marked with a recommended maximum weight) and has a lockable clip. Now open all barndoors or shutters fully. Running a light with the barndoors closed can cause the lens to crack. This also makes it easier to see which lights are working and which are not when you run up the lighting rig. 2. On a Stand Many of the above points apply, but instead of using a hook clamp, you will require a spigot. A spring washer will still come in handy and washers should still be used the same way. A safety wire is obviously not as important on a stand, but it is still important to get the cable coming out towards the bottom of the light. On some fixtures this may require a bit of adjustment of the yolk, even taking it off and turning it around! It may take a little while, but it is well worth it to save blowing a lamp in the middle of a show. What Lamp Is It? Would you like to know the difference between a T27 lamp and a T19 lamp? Would you like to compare the lamp you have with one you'd like to order? Then download our free lamp posters and find out more! Halogen & Discharge Lamps >>> Halogen Lamp Poster (T19, T27, GKV, P2/7 etc) Discharge Lamps (MSR, MSD, MSI etc) |
||||||||||||
|
|
|
||||||||||||
|
If you require further product information, please visit our links page or contact John McKissock
Back to top |
|||||||||||||
|
|
|||||||||||||
|
Copyright © 2009 Clearlight Shows Pty Ltd. All rights reserved - designed by 3Pstudios of aussicom international pty ltd melbourne
|
|||||||||||||
|
Call us now +61 3 9553 1688
|
|||
| home | about us | services | sales | hire | production | specials | news | faq's | contact | |
|||